In this post I will focus on deploying WiFi profiles with pre-shared keys (PSK) to Windows 10 devices using a custom device profile in Microsoft Intune. There are a few good posts about this topic already and various methods but I’ll try to consolidate all the info I found, walk you through this step by step and also give you some troubleshooting tips on the way.
Prerequisites:
- Export a WiFi profile from a computer that is already connected to the network
- Test device
Exporting a WiFi profile
We will use the almighty netsh command for this job. Start a command prompt an type:
Netsh wlan show profiles
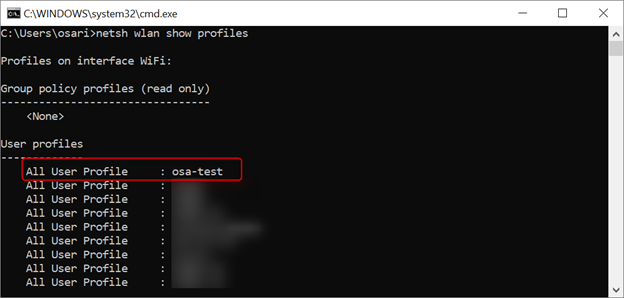
This will show you all the WiFi networks you’ve connected with. Now we need to export the relevant profile revealing the password in plain text to a .xml file. For this post I’ll be using a WiFi network with the SSID osa-test, but before I continue I want to show one other command:
netsh wlan show profiles name=[profile name] key=clear
In this example the exact command will be netsh wlan show profiles name=osa-test key=clear
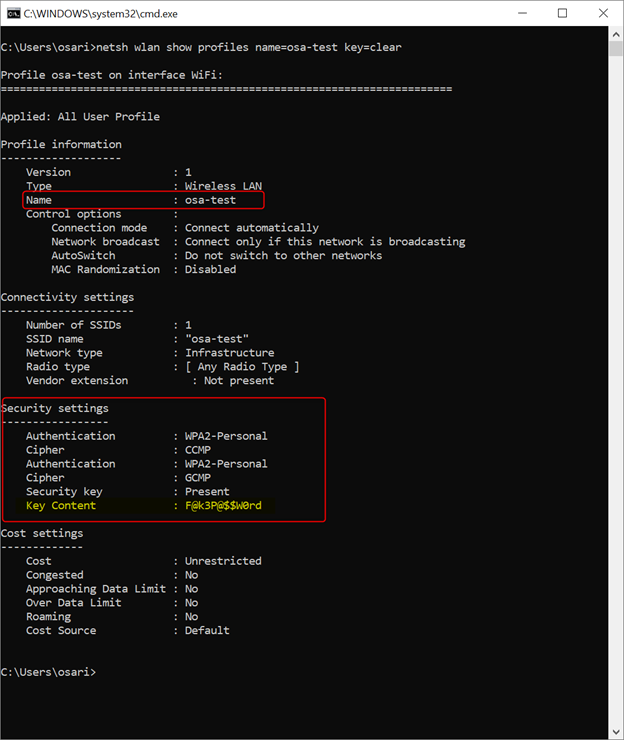
All the info you need about a particular WiFi network. The Key Content will contain the passphrase for the network.
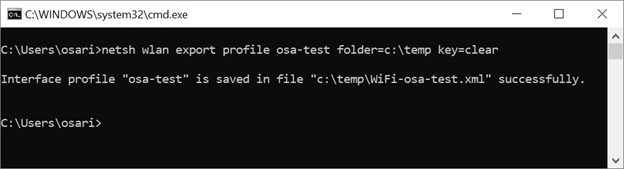
Now let’s export this to a .xml file with the following command: netsh wlan export profile [profile name] folder=c:\temp key=clear
netsh wlan export profile osa-test folder=c:\temp key=clear
You have exported the WiFi network information to a .xml file with the following code:
<?xml version="1.0"?>
<WLANProfile xmlns="http://www.microsoft.com/networking/WLAN/profile/v1">
	<name>osa-test</name>
	<SSIDConfig>
		<SSID>
			<hex>6F73612D74657374</hex>
			<name>osa-test</name>
		</SSID>
	</SSIDConfig>
	<connectionType>ESS</connectionType>
	<connectionMode>auto</connectionMode>
	<MSM>
		<security>
			<authEncryption>
				<authentication>WPA2PSK</authentication>
				<encryption>AES</encryption>
				<useOneX>false</useOneX>
			</authEncryption>
			<sharedKey>
				<keyType>passPhrase</keyType>
				<protected>false</protected>
				<keyMaterial>F@k3P@$$W0rd</keyMaterial>
			</sharedKey>
		</security>
	</MSM>
	<MacRandomization xmlns="http://www.microsoft.com/networking/WLAN/profile/v3">
		<enableRandomization>false</enableRandomization>
	</MacRandomization>
</WLANProfile>
A word of caution
Please be aware that this file contains your WiFi password in plain text. Make sure you protect this file accordingly.
Also Make sure the section <protected>false</protected> in your code is set to false. When set to true, the device could expect an encrypted password, and then try to decrypt it; which may result in a failed connection.
Creating a custom device configuration profile
- Logon to your Azure portal
- Navigate to Microsoft Intune> Device Configuration> Profiles
- Click on Create profile

- Enter a Name and Description for the custom profile
- From the Platform drop-down list, select Windows 10 and later
- From the Profile type drop-down list, choose Custom
- Click on Add to create your OMA-URI setting
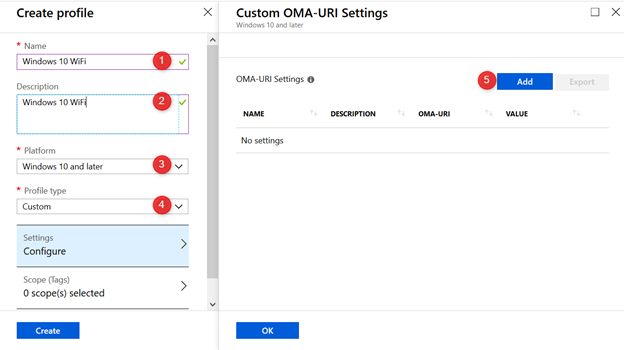
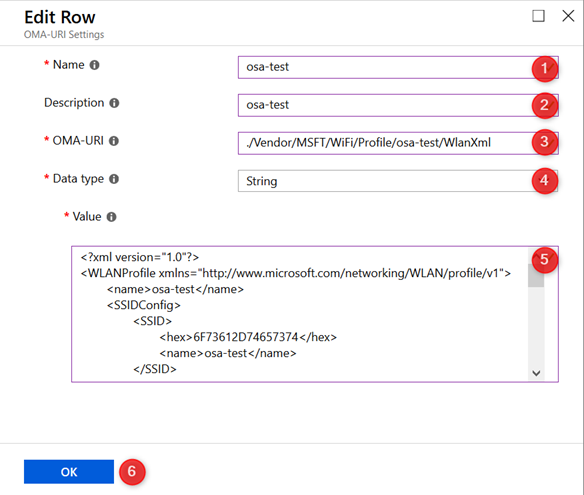
Add a new OMA-URI setting with the following properties:
| Name | osa-test |
| Description | osa-test |
| OMA-URI | ./Vendor/MSFT/WiFi/Profile/osa-test/WlanXml |
| Data Type | String |
| Value | Copy/paste code from the exported xml file |
Note: OMA-URI is case sensitive!
The OMA-URI value is in the following format:
./Vendor/MSFT/WiFi/Profile/YOUR SSID HERE/WlanXml
Note: don’t forget the dot character at the beginning!
- Click on OK when you are ready
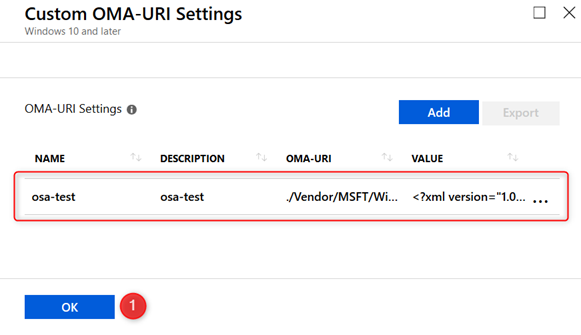
Your OMA-URI setting is now ready to be deployed. Just click on OK once again.
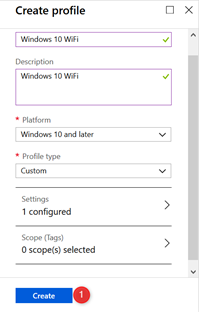
On the Create Profile blade click on Create to finish your Custom Device Configuration Profile
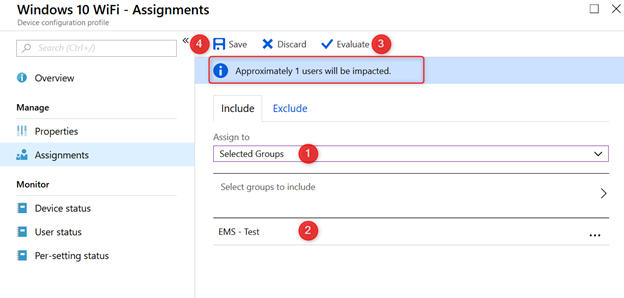
The only thing left to do, is to assign your newly created device configuration profile to a group of users.
- Click on Assignments
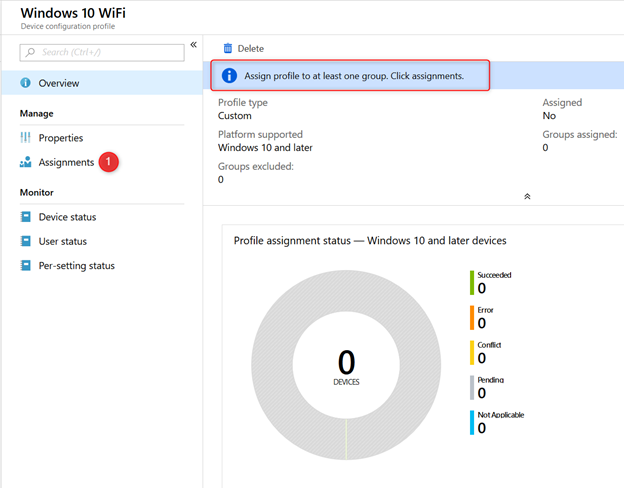
Start with a test group to make sure everything is working correctly before deploying it to all your users.
- From the drop-down menu choose Selected Groups
- Now select a pilot group. In this example the group name is EMS – Test
- Now click on Evaluate; This will show you how many users are affected by this policy
- Finally click on Save to assign your Intune device configuration policy
After a while your devices will start to receive the WiFi profile and users will be able to connect to the network automatically.
Troubleshooting remediation failed errors
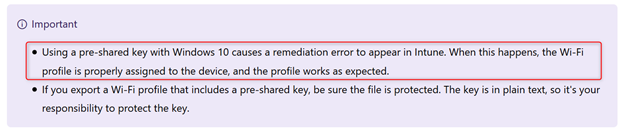
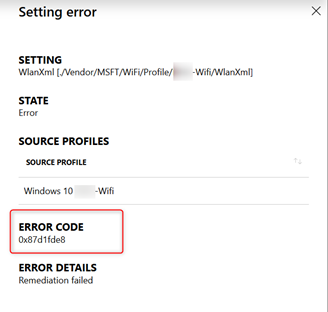
The Microsoft documentation tells us that using a pre-shared key with Windows 10 causes a remediation error to appear in Intune. When this happens, the Wi-Fi profile is properly assigned to the device, and the profile works as expected.
So the remediation error -2016281112 (Remediation failed) with hex code 0x87d1fde8 seems to be a typical ‘works as designed’ and can be ignored. Personally I don’t like these kind of false positives to show up in a live environment but I guess I’ll have to live with it. Perhaps I can get some answers on Microsoft Ignite this year. If so I will share the update here.
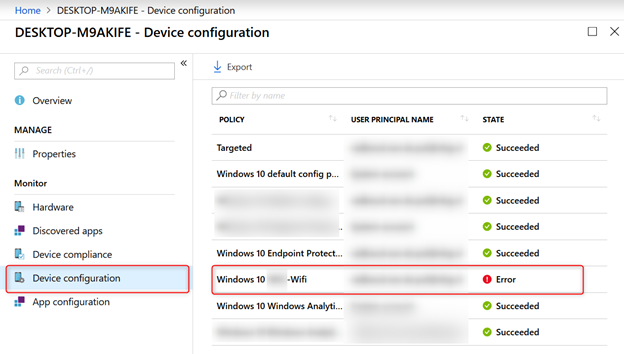
Have a look at the overview page from your device configuration profile:
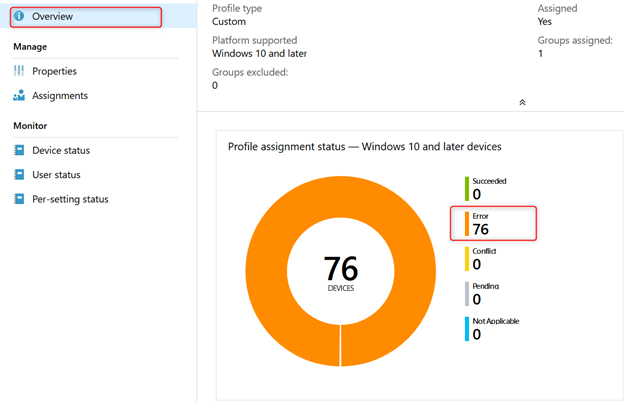
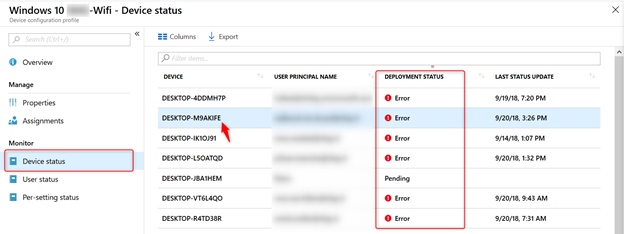
- Click on Device status
- The Deployment status will show an Error
- Click on any device to further investigate
- From the Device Blade Click on Device configuration
- Click on the Wifi profile
Here is the actual Remediation failed error:
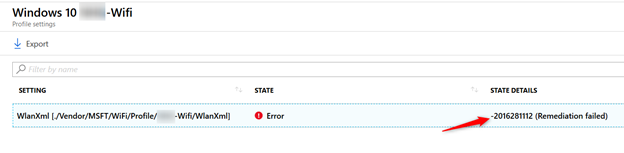
When you click on the error, you can read the hex value.
Like I said, the WiFi profile should have been deployed and your computer should be able to connect to the WiFi network. Just make sure you test functionality before deploying it to all your users,
Troubleshooting hidden SSID WifFi networks
When the WiFi network uses a hidden SSID you will have to make a modification to your exported xml file.
Open the exported xml file and add this line to your code right after </SSID>:
<nonBroadcast>true</nonBroadcast>

That’s it. The WiFI device configuration profile is ready and all your devices should be able to connect even when the SSID is hidden. I hope this post will help you configuring these settings with Microsoft Intune.
Reading material
- Use a custom device profile to create a WiFi profile with a pre-shared key – Intune
- Custom OMA-URI settings for Windows 10 devices – Intune
- WiFi CSP
- Assign user and device profiles in Microsoft Intune
Hi,
In my tests (months ago) the user still has to select/click Connect for Connection. The WiFi connection is still a ‘manual’ Interaction. So not 100% automatically. Or has this changed?
Hi Rkast, Have a look at the xml above and see if your connectionmode is set to auto. I have tested like above and my users do not need to connect manually.
Ok so when deployed the client connects automatically without selecting the ssid, will try/look for auto! Thanks for reply.
The issue with the remediation error is now fixed in intune since last week.
Thanks for posting. we have a scenario where we have a preshared key for a user name (it’s actually a vlan). Is there a way to ingest the username and password?